Wondering how to make a donation page on WordPress? Well, stick with us till the end to know how you can easily create a donation form in WordPress.
It’s very important for non-profit organizations to collect funds. These days the easiest way to collect donations from your supporters is through donation pages.
Donation forms not only get you more donations but also allow you to gather information about your donors. This way you can stay in touch with your supporters and make donor engagement easier.
But before we jump in let’s find out more about how a donation form can help you. Let’s go.
Why Create a Donation Form on WordPress?
A donation form makes it really easy for non-profit organizations to collect funds online from donors. You must be thinking just a simple donation button does the trick. However, using the donation form can be more beneficial for you and your website.
Embedding a donation form on your WordPress site instead of using a donation button helps you to:
- Easily retrieve the required donor information.
- Give your donors a more professional experience.
- Insert and add donation forms anywhere on your site.
- Easily integrated payment solutions that can allow you to accept payments online.
- Add a double opt-in option to ask your donor if they want an email newsletter subscription.
With that said, let’s start the guide on how to make a donation page on WordPress.
How do You Make a Donation Page on WordPress?
Before creating a donation form you need to choose a powerful and easy-to-use plugin. This is where the best form builder plugin Everest Forms comes in.

With Everest Forms’ form builder, it’s super-easy to create a WordPress donation page and embed it on your site. What makes it so special is it offers you a prebuilt donation form. This makes the form creation process hassle-free and time-saving.
You can further customize this template according to your preference. Well, that’s not it, Everest Forms also integrates your site with powerful payment gateways like PayPal and Stripe. Thus, you can easily accept donations online.
Now, in order to learn how to create a donation forms in WordPress, just follow the simple steps below:
Step 1: Create a New Donation Form Using Everest Forms
The first thing you need to do is install and activate Everest Forms from your WordPress dashboard. If you need detailed steps, just go through this YouTube tutorial.
1.1 Install and Activate Everest Forms Pro
Once you’re done installing and activating the free version of Everest Forms. Move further to get the pro version of Everest Forms. For that visit Everest Form’s official website first.
Everest Forms offers various premium plans. However, to create a donation form in WordPress purchase the Professional Plan. Only then can you unlock the donation form template.

You can also go through this article to find out how to install Everest Forms pro in detail.
1.2 Install and Activate PayPal and Stripe add-on
Since you’ve got the pro version, you can now easily install any of the Everest Forms add-ons. For that navigate to Everest Forms >> Add-on.
Next off, search for the Stripe add-on and PayPal Standard add-on. Then simply, click on the Install Addon button and press Activate subsequently on both the addons.
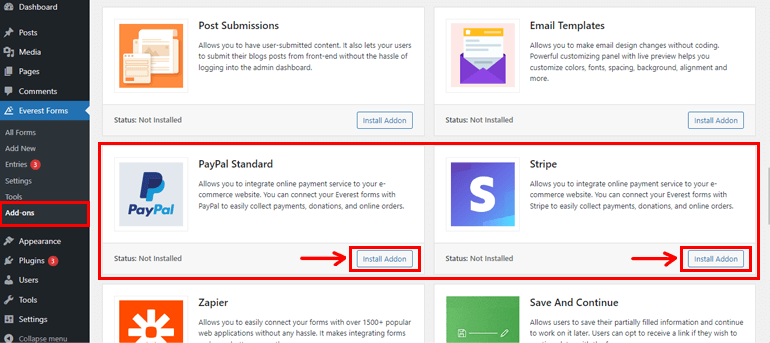
You’ll know the add-ons are active when the status says Activated.
1.3 Create a New Donation Form
You can either create a simple donation form just by clicking on Start from Scratch. Check out this article on how to customize a form in WordPress for detailed steps.
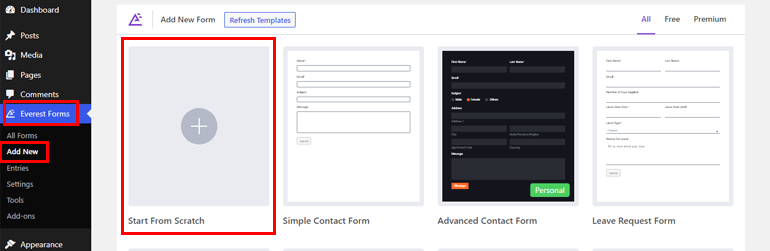
Or use the pre-built donation form template. To use the pre-built template, go to Everest Forms >> Add New and choose the Donation Form template.
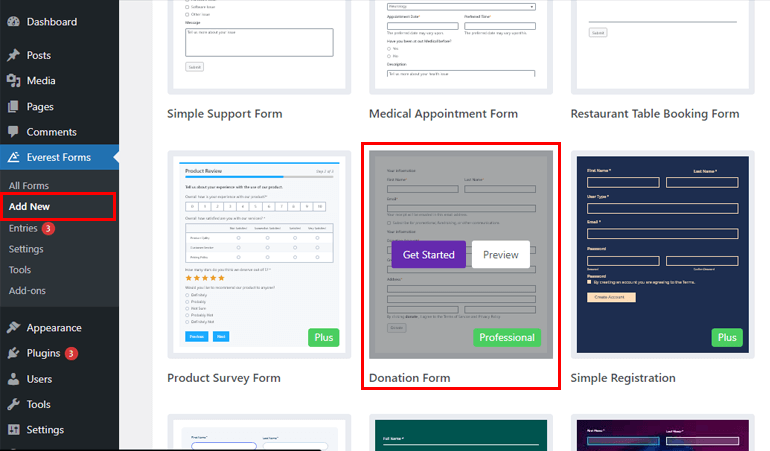
Now it’s time you name your donation form. Here you’ll also see the PayPal and Stripe addons are already check-marked as you’ve activated both of them. Now to further edit your form click on the Get Started button.
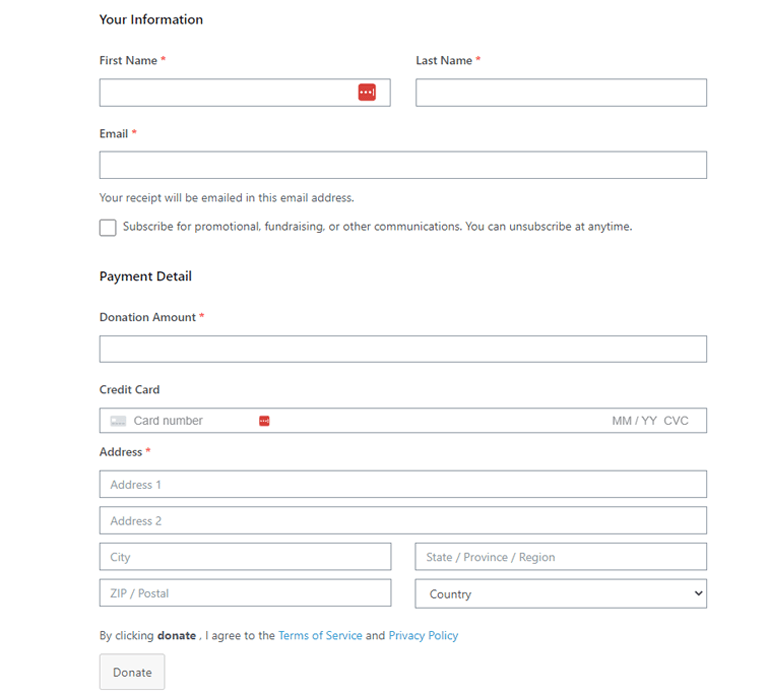
Above is the preview of the donation form template which includes all the important fields a donation page WordPress should contain. However, you can edit the fields and customize them according to your need.
To add extra fields, just drag and drop them on the form. Also, you can add as many fields according to your form’s requirements.
1.4 Connect the Form with a Payment Gateway
Once you’re done creating your donation form, you can further configure the payment getaway setting. So, this section will teach you how to accept donations on WordPress online.
As mentioned earlier, Everest Forms connects you with powerful payment gateways like Stripe and PayPal Standard. Now to further customize them, navigate to Payments tab on the form builder. You can either choose Stripe or PayPal.
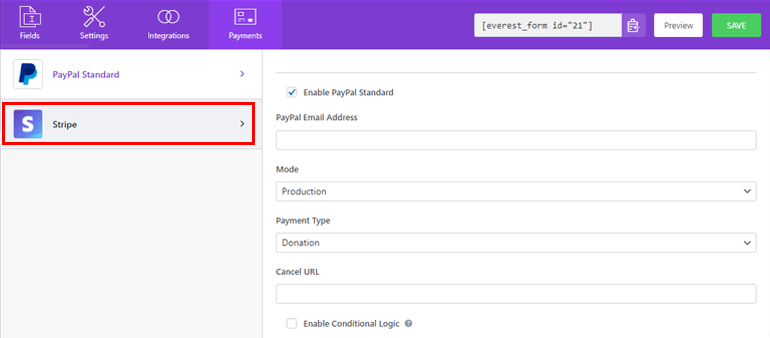
First, let’s find out how to accept payments through PayPal. For that select the PayPal Standard from the Payments tab.
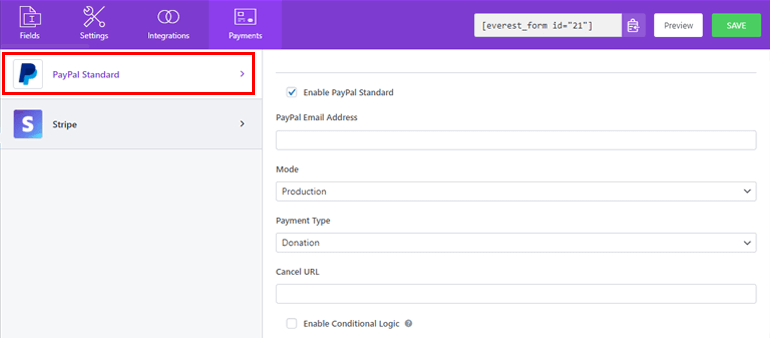
You can now find various setting options which are explained below:
- Enable PayPal Payment: To enable or disable PayPal Standard on your donation form.
- PayPal Email address: For inserting the receiver’s email address of the PayPal account.
- Mode: To select the mode of transaction where you’re given two more options: Sandbox and Production. While Sandbox is for testing purposes, Production is for receiving donations.
- Payment Type: Here you can choose the payment type. Since you’re creating a donation form, select the Donation option.
- Cancel URL: Here you can enter a redirect URL if your user wants to cancel after redirecting to PayPal.
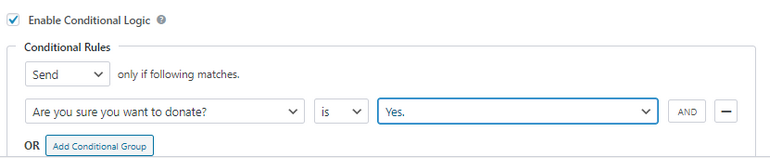
- Enable Conditional Logic: It’s useful if you want to add a conditional rule to receive donations.
Now to proceed with the Stripe setup you require your Stripe account’s API keys. For that head to your Stripe dashboard and visit the API key page under the Developer tab. Simply copy your Publishable key and Secret key.
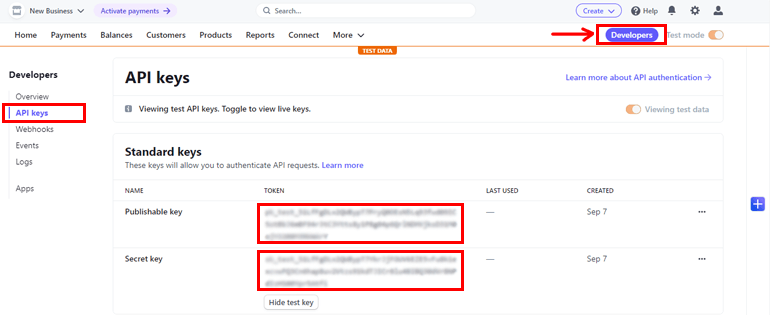
Again, go to your WordPress dashboard navigate to Everest Forms >> Settings >> Payments, and paste the keys to the appropriate fields.
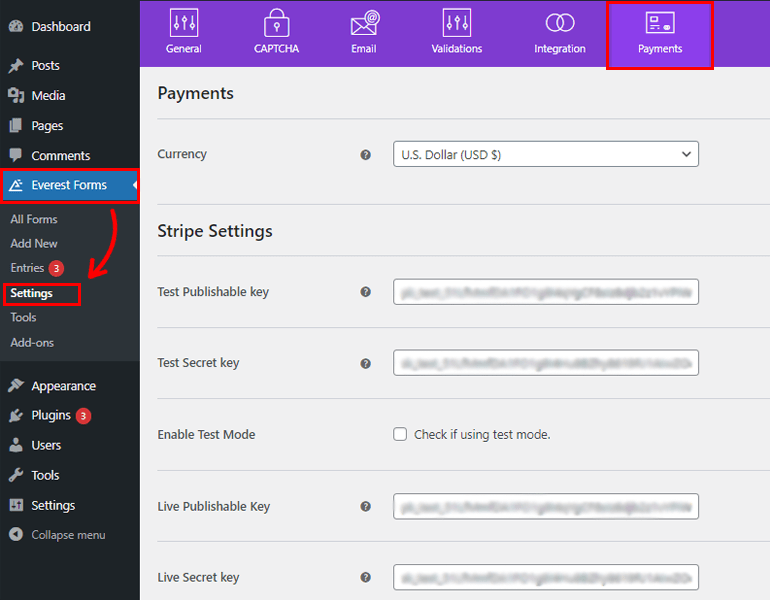
Once you’ve filled all the required fields come back to Payments >> Stripe to enable it.
However, make sure to disable PayPal before enabling Stripe if you wish to receive funds through Stripe. You can also see all the funds you’ve received from Everest Forms >> Entries option.
Whereas, if you need details in depth, check out our article on how to accept payments using Stripe.
After, you’re done creating the donation form by following all the steps hit the green SAVE button. That’s it you’ve just learned how to accept donations on WordPress.
Step 2: Add Donation Form to Your WordPress Site
You’ve successfully created a donation form using Everest Forms. But it won’t be visible to your users unless you display it on your WordPress website.
Hence, to add a donation page WordPress to your site, you can use two methods, one is by using Shortcode.
For that navigate to Everest Forms >> All Forms. There you’ll see the form you’ve created along with its shortcode. Now copy the shortcode of your donation form to display it on your site
The next thing you need to do is create a new page or post, you’ll get to the Gutenberg editor. Here press on the add block icon and search for the shortcode block and click it to add a block.
Now paste the shortcode you just copied and click on the Publish button. That’s it, your form will be displayed on your site.
The next option to add a donation page WordPress is by using the Everest Forms block. For that alternatively, go to Posts/Pages >> Add New.
Then, click on the ‘Add Block (+)’ button and search for the Everest Forms block and click it. Once you’re done, select your WordPress donation form from the drop-down menus.
Finally, you can hit the ‘Publish’ button at the top. And there it is, you’ve your donation form successfully created and published for your non-profit organization.

Wrapping It Up!
And that’s a wrap for our guide on how to make a donation form on WordPress. We hope you’ve learned how to create donation forms in WordPress easily by now.
Don’t settle for half-featured plugins when it comes to fundraising for your non-profit organizations. Thankfully, we’ve got feature-rich form builder plugins like Everest Forms. To find out why 100000+ users trust this plugin visit Everest Forms review.
Also if you’re interested you can check out our article on how to make a multi-column form in WordPress.
Finally, if you like this blog, feel free to share it on your social sites. Also, don’t forget to follow us on Facebook and Twitter for future updates.